 |
| Making "No Men" with Pappy |
 |
| Making Weird Faces |
Making Christmas ornaments! Every year my sibs and I do an ornament exchange, with a good attempt at doing homemade ones. This year, the Perdues are saving every single penny to start our B&B renovations, so we were looking to score homemade on the cheap. After raiding some cupboards, here's what we came up with:
Salt Dough Ornaments!
 |
| Fox & Hedgehog |
 |
| Lady Bears |
2 cups flour.
1 cup salt.
1 cup water.
How simple is that?! You can bake them, but we didn't want to deal with the brown spots some people ended up with. We tried microwaving some of them (four minutes is WAAAAY too long! Hello, smoking black pile of stinky. Better luck with 5 second intervals!) but we ended up with weird bubbles from that. So we went the ultimate lazy route, and they sat on the counter to dry for two days. Just make sure you keep turning them so they dry all the way through.
You will also need:
Cookie cutters.
Wax paper if you're smart. Good luck peeling that off of your moms counter.
Ribbon or twine.
Some sort of hole poking device! We used a drinking straw, but any old chopstick will do.
Optional:
Stamps for decorating those dudes, or buttons to embellish.
Food coloring if you feel like it. (If you want completely colored dough, mix in the food coloring with the water. If you want it marbled, add it after the dough is mixed and fold it in.)
 |
| Festive Fox |
 |
| Simple & Marbled |
We stamped ours while they were still doughy, then added color with some Sharpies when they were dry. So easy.
Next on the list...
Bird Seed Ornaments!
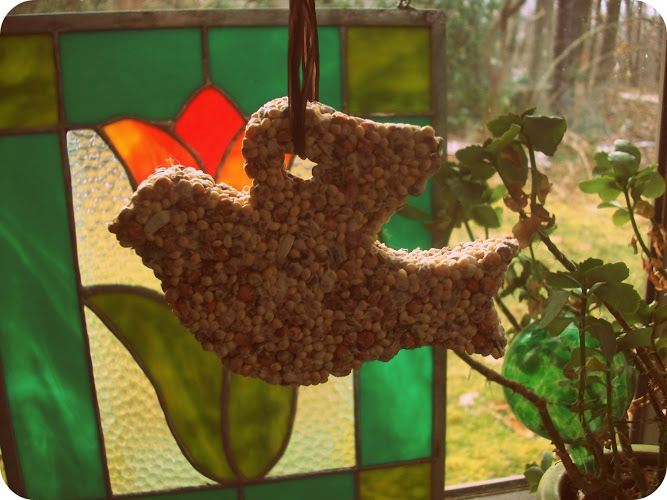
Also super easy, but when I started making these I was convinced it was going to be an epic fail.
Also a ton of recipes for these, but most of them call for unflavored gelatin (not in the cupboard!), so the recipe I used was this one:
3/4 cup flour
1/2 cup water
3 tablespoons honey
4 cups of bird seed.
You will also need:
Cookie cutters.
Previously mentioned hole poking device.
Better not forgo the wax paper.
Raffia or twine for hanging. (I preferred a natural fiber for this, in case the birds stole it for nest making)
Mix that mess up, be doubtful that it will work, then cram it into your cookie cutters. I made the hole while it was still in the cutter, and I coated my cutter with some cooking spray to make it easier to get the mix out while holding the shape. Put them on wax paper and let them dry overnight, turning them frequently to make sure they dry on both sides. I used raffia to finish them off.
Happy making!
No comments:
Post a Comment